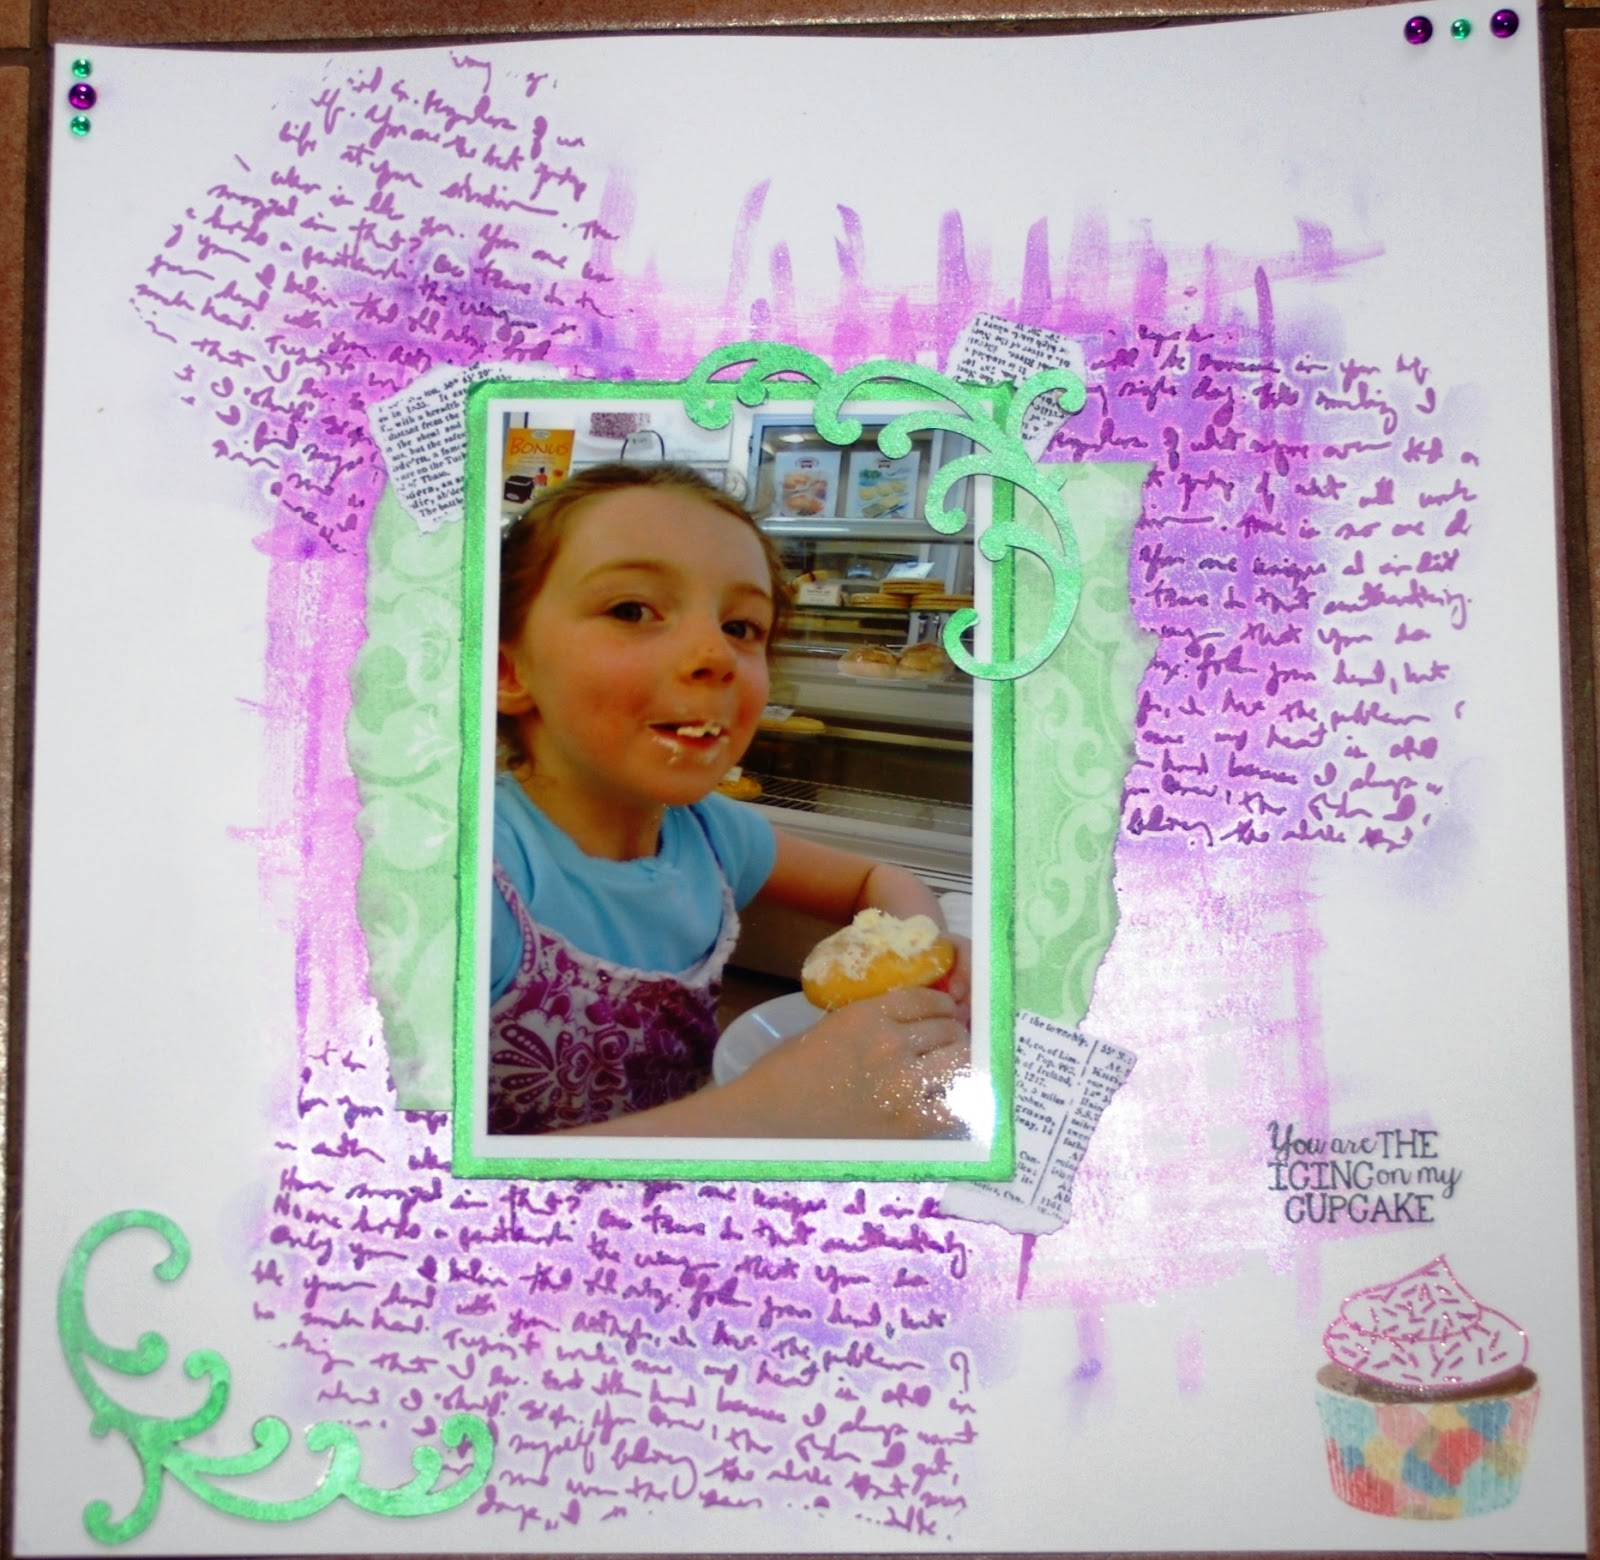
You are the ICING on my CUPCAKE
I love the look of the inspiration photo for
the April: White With A Twist challenge at Scrapping Outback:
Doesn't that look positively delicious?!! I love the magenta colour with the mint-green colour of the ocean behind it and was looking forward to putting this page together.
I remembered to choose my chipboard first for this layout (!), and selected two lovely flourishes. I painted them with gesso first, and then covered them with 'Wintermint' Twinkling H2O, to give them sparkle. Chipboard ~ check!
There is a lot of work in the background of this page. After selecting a piece of Double Thick Bazzill Cardstock, I applied a thin layer of dry-brushed gesso across the middle section, back and forth and up and down, creating a cross-hatch sort of texture. Once it was dry, I used my 'Wisteria' Twinkling H2O and a finer brush and applied the watercolour paint in the same cross-hatch pattern. [You can't tell from this photo due to the flash point, but the cross-hatching formed a square in the middle of the page. The detail photo below shows that up better.]
Whilst that was setting, I mixed up some Light Molding Paste with some Lilac Posies' and 'Grape Jelly' Memento ink, and then using the 'Mini Believe Script' by TCW, I stencilled my purple paste in some random sections on the page, making sure some of it went over the purple cross-hatch watercolour paint in the middle. I left the stencilled molding paste to dry overnight.
I felt the stencilling that was over the watercolouring needed to be highlighted a bit, so I used a purple Gelato and lightly rubbed it across the top of the stencilling, and then blended it in with my fingers.
I had selected this very cute photo of my daughter eating a cupcake, and so I wanted to put a cupcake on my page somewhere. Using my Avery Elle 'Cupcakes' stamp set, and my Stampin' Up! pastels markers, I randomly coloured the wrapper stamp with light colours, and stamped it on the bottom right hand corner of the page. I then coloured the cupcake topper with a brown marker for the "cake" and light pink marker for the "icing" and stamped this down. Using the adorable little "sprinkle" stamp, I added sprinkles to top of the icing. I then went over the "icing" and "sprinkles" with a magenta Starburst Gelly Roll pen. The gorgeous sentiment from that stamp set, reading "You are the ICING on my CUPCAKE" is so cute and it really suited this layout and photo beautifully. It has been stamped using Versafine 'Onyx Black'.

The photo was matted on some mint green paper that I had distressed around the edges, and then painted with 'Wintermint' Twinkling H2O for some shine. It was all layered up on some extra patterned paper in mint green, with some text patterned paper to break it up a bit. One chippie flourish was added directly to the photo and the other was added to the bottom left corner of the page.
To finish the layout, I added 'Mint' and 'Boysenberry' Sprinkles to the top corners to balance out the page.
I loved this challenge from
Scrapping Outback!
Cheers!
Deb.xx


.jpg)
.JPG)
.JPG)


