30 March 2015

A bit of Facebook fun!

Zentangles


I've found a few awesome crafting-related groups on Facebook to join in on for inspiration, etc, and today I discovered that two of them (at least) have monthly challenges.  The first one has a challenge to incorporate doodling, and the second one wants a layout of 'firsts' (ie first day of school, etc).

So, I've decided to incorporate the two into one post.  Firstly, for the Scrap It With Attitude group, I have made a Zentangle card...
I've had a bit of a look at Zentangles on Pinterest before, and had a minor dabble with it, but nothing too serious, and certainly not to any finished state!  So it was quite the 'labour of love' to actually start and finish this cardfront today.  I decided to keep it monochrome in the graphic as I'm just learning this awesome art, but I felt that it did need some colour, and so the "happy birthday" was stamped in red.  I love how this card came together (although it was a lot of work!).

Then, I thought why not scrapbook a page about my first Zentangle, to enter into Jodie's Scrap n Chat group...
I have just finished this layout this evening, and so wasn't able to take a very good photo due to lack of natural lighting (and shadows!)  But you get the idea!  The design for the layout was learned at a class on the weekend, taught by the fabulously talented Beck BT (aka Beck Beattie).

There is watercolouring and splattering with Twinkling H2Os, delicious Tinby Designs Metallic Melts (both dry and with VersaMark Dazzle in Champagne), stamping with StazOn, script stamping with gold Silks Acrylic Glaze, and some streaks of Gesso, as well as some leftover foil from the weekend's class (that had been run through a texture plate), gold chevrons and a background diecut from Annabelle Stamps.

That's a lot of effort to show off one tiny little card, but then, the card had a lot of effort put into it and so perhaps it did deserve a special layout to showcase it!

As I said in the post title ~ A bit of Facebook fun!

Deb.xx


Pixels & Paper ~ March Challenge

Uptown Girl


I'm a bit late getting this one in, but I'm thrilled to enter my layout in the Pixels and Paper March Challenge!  Here is the inspiration photo for this month:
 There were so many possibilities with this photo, from the obvious 'Ruby Slippers' and the colour red in general, to travel with the suitcase...  I had in my mind a background for my layout even before I had decided upon a photo. 
 I had unearthed some hot stamp pen foils in my stash a while ago and had been figuring out ways to use it without the hot stamp pen.  The best way I have found of using it was with some hot set powder and Versamark on stamped images.  So, I grabbed the awesome, detailed shoe stamp from the 'Fabulous You' stamp set by Stampin' Up!.  I stamped it on the smooth side of some black Bazzill cardstock and applied the hot set powder, setting it with my heat gun.  After it was done, I used the wonderful red foil and pressed it onto embossed the image and the foil transferred straight over.  I then re-set each image with the heat gun so that it wouldn't come off ~ so shiny!

Detail

Once this was done, I knew the photo I wanted to use.  My daughter's first dancing concert was in 2010, and her tap song was 'Uptown Girl' by Billy Joel.  Her cute little outfit was red with a disco sequin bodice - perfect for this layout!  I sanded round the edges to give a matted look so the photo would stand out from the background.  I used some shimmer paper in red and off-white and cut strips for mini banners under the photo.  I also made the heading with these shimmer papers, using Memory Keepers rub-ons to create the title.

The black Bazzill card was stuck down on a piece of the red shimmer paper, and stitched randomly around the edges with DMC Metallic thread in red.  I have then added some Annabelle Stamps Sprinkles in 'Chilli' and 'Black', and there you have it!

Thanks to Pixels and Paper Challenge Blog for such a wonderful monthly inspiration photo!

Thanks for visiting!
Deb.xx

25 March 2015

Scrapbook Boutique ~ March Challenge

Loving Pink Ted


Wow, I'm loving creating layouts again at the moment!!  I've just prepared another one, this time to enter into the Scrapbook Boutique ~ March Challenge!  I positively adore this blog page and online shop, and I get so much inspiration from the Design Team.  Here is a look at the March inspiration photo:
I love all those really sweet pastel colours!  I was initially going to scrap a page of a particular photo of my daughter wearing a hat, but do you think I can find the file anywhere??!?  Of course not!!  So, I had to scratch that idea and think deeper... 

Then I remembered some very sweet photos of her with her favourite teddy, Pink Ted.  I modified the photos so that only Pink Ted was in colour, and the rest was black and white.  Here is the page I came up with:
I started with freehand drawing a heart in the middle of my pink patterned paper (from the Creative Memories Gazebo collection).  I then pierced holes along the line of the heart and backstitched with purple DMC thread.  I then got my sewing machine out for this one to sew the blue, green and yellow ribbons, as well as zigzag-stitching the patterened paper onto some pink Bazzill cardstock to give it strength.

I printed out three of the photos at 2"x3" and configured them to fit inside the heart shape.  I covered a strip of the pink patterned paper with washi tape, and then diecut out the "Pink Ted" part of the title using my wonderful My Creative Time lowercase (and uppercase) fun dies!  I then added the word "Loving" with my Copic Multiliners.  A scattering of buttons and a little bit of journalling, and we're done with another layout!

Deb.xx

A Tag to Swap

Just a quick post here ~ I've been making tags to swap, facilitated by Dawn Lewis, the wonderful and talented lady behind Scrap-it TV amongst other things.
I've never really made a tag before and so I futzed about with it for a couple of weeks, experimenting with Distress Inks, stamps, die-cuts - nothing seemed right.  Truthfully, I'm still not sure I've made my tags well enough or interesting enough, but I have applied some techniques and products I've just acquired, and I'm pretty happy with how they look!

After cutting out my tags on watercolour paper, I stencilled some Light Molding Paste through my peacock feather stencil.  Once it was dry, I painted over the raised texture with Silks Acrylic Glaze in Solar Gold.  I then used some Twinkling H2Os to paint in and around the gold textured area (the Silks 'resist' the H2Os).  I added a Liquorice Sprinkle to the middle of each feather head, threaded some blue ribbon through the top, and there you have it...  All of this, times six, and my tags are ready to be packed and posted (a bit late, but hopefully they will arrive with Dawn on time).

Deb.xx

23 March 2015

Scrapping Outback ~ March White with a Twist Challenge

BEST MATES


After having a bit of a crafting break over the weekend (many, many school and kids' sporting commitments), I'm back with another layout, this time for the Scrapping Outback ~ March White with a Twist Challenge.  Each Month, Scrapping Outback post an inspiration photo that is essentially a colour challenge.  Entries must be layouts, and they must use white in combination with the inspiration photo colours.  The only other tricky bit for me is that each layout must use at least one piece of chipboard...
The piece of chipboard tripped me up with this layout this morning...  I had already photographed my layout and commenced this blog post when I realised I hadn't included any... Doh!  A mad dash through the stash and I found one, phew!
I started with stencilling some tinted molding paste through the Stampin' Up! 'Stripes' stencil.  I found these awesome blue and white striped straws at Kaisercraft and thought they'd make a pretty good frame for my photo.  I then used the Stampin' Up! 'Dots' stencil and manually embossed some Core'dinations cardstock before sanding it back a bit.  I then tore the edges to reveal more of the core.

I love the little 'Just a Note' teddy piece at the bottom - that comes from the DoCrafts 'Forever Friends' paper stack.  It originally had a pink border around it, so I fussy-cut that out, and also put a button over the little pink butterfly that was at the top right-hand corner.

I then added a handful of other buttons to the page, and some black and blue brads to the bottom.  I strung some twine around the brads to add a little something else.  The title has been created using brown craft foam and Stampin' Up!'s 'Little Letters Thinlits Dies'.  My final piece (obviously!) was the chipboard "J", which I have left natural as the colour ties in nicely.

Thanks for visiting!
Deb.xx


20 March 2015

White... with 1 ~ March Challenge: Hemlock

CRAZY ABOUT you


Wow, on a roll with layouts again!  This is my first entry with White... with 1 Challenge Blog for their March Challenge: Hemlock.  I think this is a very cool challenge idea, and I must confess, I'm really happy with the March Challenge colour:
My photo doesn't reflect the actual colour of my layout very well at all - in real life, it matches the Hemlock swatch much closer... (I promise!)
And now that I see them together, my photographed colours don't look anything like the swatch (doh!) [I want my computer with my photo editing program back!]

Anyway, I had a great time putting this page together.  I grabbed one of my daughter's kinder photos and loved that the climbing rope was almost the right colour of the swatch.  I wanted to create a background layer using Whipped Spackle, and so I stencilled that through my Kaisercraft butterfly stencil (I love both stencilling and butterflies at the moment).

Once that was dry, I watercoloured some Twinkling H2Os against the Whipped Spackle.  I also stamped some butterflies from the 'Bloomin' Marvellous' stamp set by Stampin' Up! (Sale-a-bration two years ago) using Versafine Ink onto white tissue paper [stamped off first to lighten the colour].  These were Mod-Podged onto the layout as an extra feature to the background layer.

I matted my photo on some cardstock and tied a scrap of ribbon around the bottom.  I then cut two scalloped edges (using an MFT die) and adhered these to the back of the photo mat.  Knowing that the cardstock for the photo mat had a white core, I tore two small random strips to expose the white core and put these behind my photo as well.

The "CRAZY ABOUT" part of the title was stamped using VersaFine ink (stamped off once to lighten the colour), and the "you" part of the title was diecut from white craft foam.  Both of these components are from the Stampin' Up! bundle featuring the 'Crazy About You' stamp set and 'Hello You Thinlits Dies'.

I added some Annabelle Stamps Sprinkles for some extra 'bling', and coloured up some Kaisercraft white paper roses with Twinkling H2Os.

I can't wait to see what the next colour is going to be...

Deb.xx

19 March 2015

Sassy Scrappers ~ March Moodboard Challenge

I'm back again today with another layout (hmmm, maybe I should change the name of my blog...), this time to enter into the Sassy Scrappers ~ March Moodboard Challenge.  This month's moodboard over at Sassy Scrappers was put together by Anita Bownds, and it is quite simply divine!
I've taken inspiration from the paint swatches and the colours, as well as adding the poppies in.  I wasn't sure what photo to use at first, but then I remembered a photo shoot of my daughter in the year she was born ~ back before I was a scrapbooker ~ I think this photo is perfect!!!
I've put a lot of work into the background of this page, so that it is it's own layer.  I started with stencilling white Molding Paste through the Hearts Stencil from Stampin' Up!.  After it was dry, I got out my new, oh-so-yummy, Twinkling H2O's to create the paint swatches. I decided to create a sort of platform for my heading with the gold paint, and then allow the gold to run down in rivulets across the other paint colours.

Next, I stamped a poppy flower stamp from the Simply Sketched stamp set onto the layout randomly, using StazOn Ink.  Using the orange/bronze H2O from my paint swatches, I watercoloured the stamped images that were not across the paint swatch.  I stamped and punched out some flowers from the Flower Shop stamp set (with co-ordinating punch) in different colours and put together the photo with layers of the flowers.  (There is also some sheer organza ribbon in light pink and gold across the bottom for texture.)

The heading was created by cutting out, first in Bazzill cardstock, then in white craft foam, the letters using the totally awesome Uppercase and Lowercase Fun Dies by My Creative Time.  It gives the heading some punch when it is layered on the craft foam.

I love how this layout came together.  Thanks to Sassy Scrappers for such a wonderful moodboard challenge!

Deb.xx

18 March 2015

Kraft+ March Challenge ~ All that Glitters

~BeYOUtiful girls!!


I'll come right out and say that sketches are rarely easy for me.  Strange, I know!  However, I'm loving working with a Kraft base at the moment, and I'm super-keen to support the wonderful fledgling blog, Kraft+.  And yes, they have a sketch challenge this month over on the blog: "the Kraft+ March Challenge ~ All That Glitters".  Here it is!
This one has been a work-in-progress for about a week-and-a-half, trying to sort out what I wanted to achieve with this layout.  In the end I'm actually pretty stoked with the page I've created, but it took a lot of brain space!!
I started by mixing some modelling paste with some purple ink and then added some Tinby Designs Metallic Melts in 'Royal Purple' to the mixture.  I then stencilled this using an old swirl stencil I found.  After it was stencilled, I gave it a blast with the heat gun so the Melts could set.  It gave a fantastic texture to the swirls!  (I snaffled this idea directly from Sandra's blog post for Scrappy Chat Designs!)

I wanted to keep having fun with the Metallic Melts, so I employed a trick I saw on Pinterest:  heat up metal brads with the heat gun, dip them into the Metallic Melts (or embossing powder) and then set with the heat gun...  So very effective!  I used this technique (with 'Royal Purple' again) on my ribbon glider brads (they were already a shade of purple underneath), and on some small silver heart brads and a couple of pale purple brads.  Here is a close-up showing one of the heart brads and a couple of the purple ones...
The embossed circles on the page are also using Tinby Designs Metallic Melts.
I put down a couple of lengths of washi tape in line with the stencilled swirls, and there my page sat for about a week.  I wasn't even sure at that stage what photos I would use, and that really is backwards for me.

I fussy-cut some butterflies out of some purple patterned paper from Kaisercraft - and the idea of butterflies got me thinking about Kaitlyn's Shimmer Party two years ago where most of the girls had their facepainting done as butterflies.  An idea was starting to form...

I put more purple into the background using Twinkling H2O's, as well as some silver embossing and silver ink smudging with my fingertip.  I grabbed some chipboard butterflies and embossed them with silver as well, and started to pull the whole page together.  The chipboard circles (Crazy Circles from ScrapFX) have been heat embossed with 'Royal Purple' Metallic Melts. 

I used a Kaisercraft die for the title, and cut it out of 'Blackberry Bliss' Stampin' Up! cardstock.  The fussy-cut butterflies and the title have had clear Wink of Stella applied to them and I added some 'Plum' Sprinkles from Annabelle Stamps as well.

Lots of glittery goodness and I've followed the sketch (for the most part).

Deb.xx

17 March 2015

"Happy" - learning new Mixed Media techniques

I've always been a pretty simple scrapbooker - probably due to having been introduced via Creative Memories all those eons ago.  I then made a foray into cardmaking and stamping several years ago, and still my preferred style has always been clean and simple.  I was always envious of those magnificent 'creations' I'd see out in the blogisphere with multiple layers and such creative artwork that they would leave my mind spinning (both cards and layouts).

Well, thanks to a tiny stroke of pure luck, I'm starting to branch out and incorporate Mixed Media into my layouts (and cards).  Through a friend of a friend (twice removed, lol), I went to my very first Retreat in February, and at that Retreat we were treated to a mixed media layout demonstration by a wonderful lady by the name of Beck Beattie ("Beck BT" to those in the know!).

I have since been to another of Beck's classes, and the layout below is the result of attending that class (please excuse the poor photography and lack of editing; photography I have no excuse for, but the editing is because I'm not able to access my computer at the moment):
 The class was based around using DecoArt Crackle with a stencil, and then working Twinkling H2O's through the background.  OMG, I'm in love!  The DecoArt Crackle is a fantastic medium to work with and then the Twinkling H2O's came into my life...  Check out the shimmer and shine of those H2O's!!

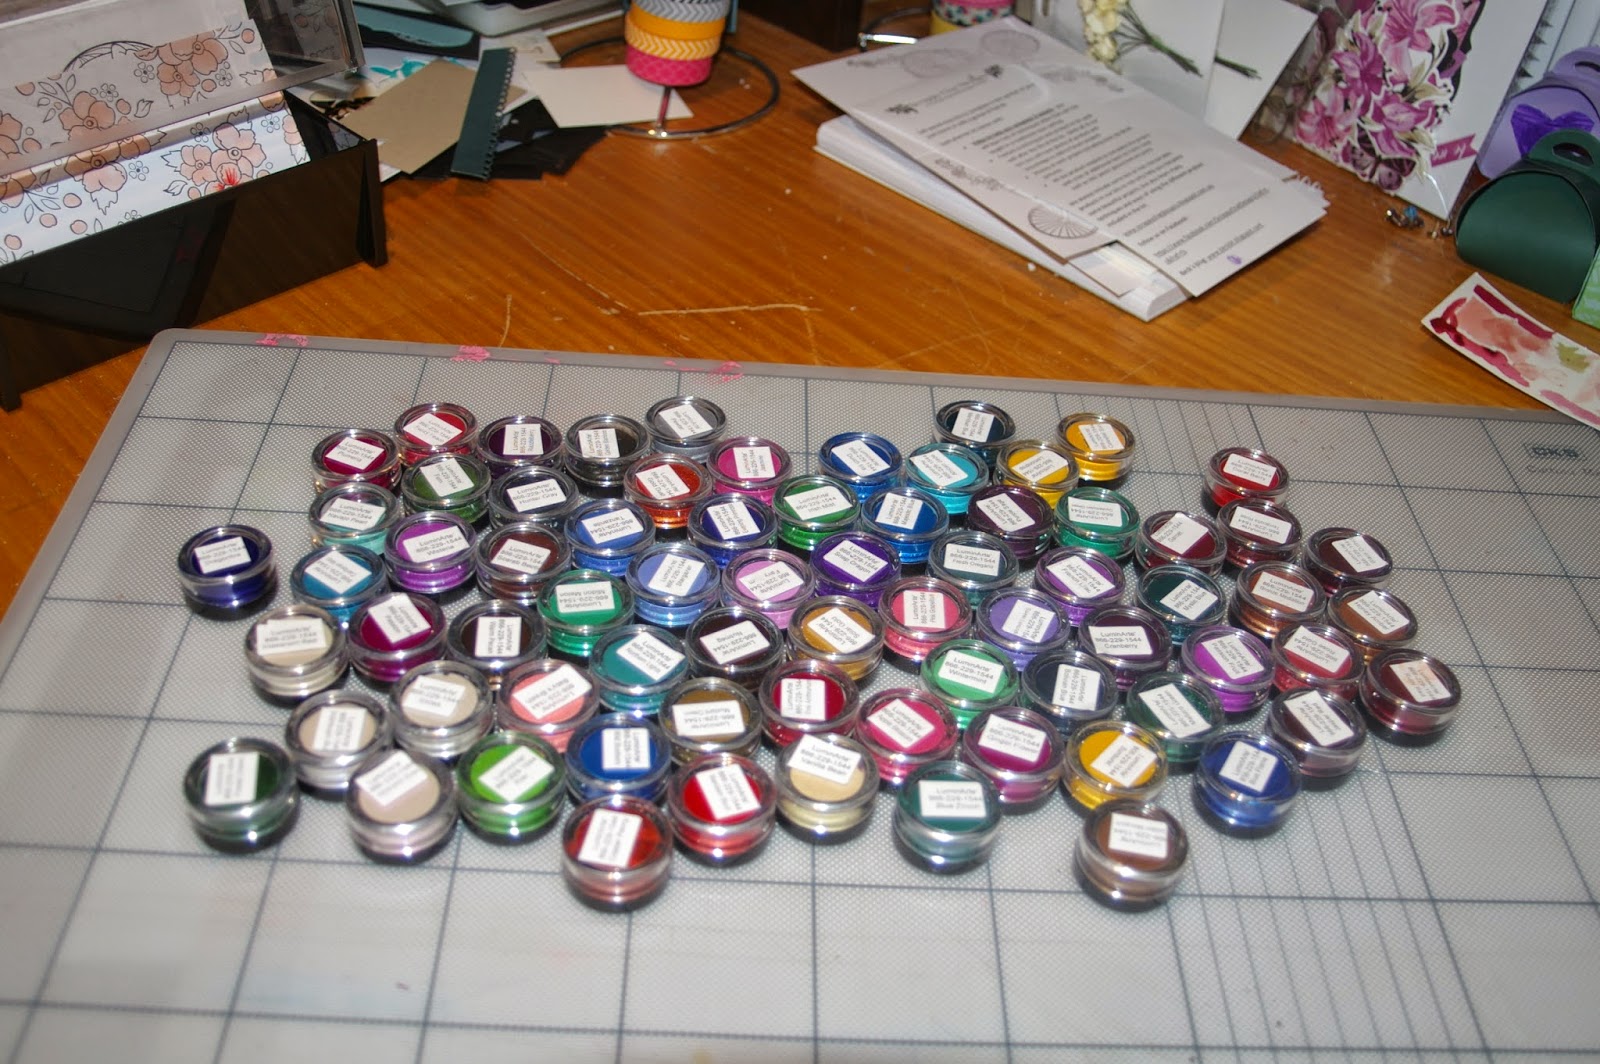
Let me just add a little 'aside' here:  Here is a photo of what arrived in my happy mail this morning, courtesy of an awesomely lucky ebay purchase:
A 'bulk lot of 72' assorted Twinkling H2O's!!!  EEEEEK!!!

Anyway, whilst I am certainly a long way from making magnificent, multi-layered, multi-faceted creations, I am definitely starting to have a go with mixed media, embracing the warp (lol, Beck!) and enjoying getting messy with it!

Thanks for stopping by!

Deb.xx


11 March 2015

Blood donation: totally unrelated to crafting...

... but something I'm equally passionate about!


 Today I have donated my plasma (or "liquid gold") for the 15th time.  It took me most of my 40 years to be able to face a needle and pluck up my courage.  Now it is something I try to do at least once a month, and sometimes twice.

My theory is this - if I am going to have a needle put into my arm, it may as well be by a professional who does it for a living (I love my professional vampires at the Latrobe Donor Centre in Bundoora).

There are many criteria to being a blood donor, and these are all available through the ARCBS website "eligibility quiz", etc.  Sadly, some people feel they are being discriminated against if they do not meet the criteria.  This is a shame to feel that way because, hey, even though we're the donors, it's actually not about US.  It is about the people who need our blood products - they're the ones who are sick!

I have a friend who actually needs to be bled once a month because her haemoglobin level is too high (the ARCBS performs this service for free).  One day we were talking about blood donation, and this friend complained that all the blood she has bled out of her gets thrown away.  She felt that was such a waste when donors were desperately needed.  This idea makes sense initially, until you realise this:  if her haemoglobin level is no good for her, what makes it any better for people who are sick???
 The ARCBS provides an amazing service, and they need our support, especially around holiday periods.  If you've ever thought about blood donation, why not check out the eligibility quiz to see if you meet the criteria.  And if you don't, that's okay - you tried.  Perhaps there are other ways you could help, like maybe by spreading the word to others to see if they're eligible...

Give it a go, and spread the word!!!

Deb.xx  (Plasma Donor and proud of it!)

04 March 2015

Scrap Around The World ~ March Moodboard

I was so very excited when I saw the colours of the Scrap Around The World March 2015 Moodboard ~ created by Terhi Koskinen, when the board went up on the blog on Sunday. 

I wasn't sure what sort of photos I would apply this moodboard to, but by Tuesday morning I had my answer...

There was a lot of noise from wild birds outside my suburban Melbourne home at about 8am on Tuesday morning.  It was enough to bring me outside in my PJs to investigate.  What I found was approximately 20 wild Sulfur-Crested Cockatoos sitting on the powerlines, or munching on berries on the naturestrip across the road, and even one in my Liquid Amber tree.  I dashed inside for my camera and took a bunch of photos.  Here is my page...
Starting on Tuesday evening, I grabbed one of my new pieces of white double-thick Bazzill Cardstock for the base.  I mixed up a bit of texture paste with some Daffodil Delight ink, and applied it in the shape of a cockatoo's crest.  I then mixed up different bit of texture paste with some Smoky Slate ink, and trowelled that into two different areas, quite smooth.  Once the light grey texture paste was dry, I grabbed some of my new Whipped Spackle, and applied bits over the light grey paste, to indicate feathers (smaller at the top for the head feathers; longer at the bottom to indicate wing feathers).  I then gave the top left hand side of the page a spritz with some Tattered Angels Glimmer Mist in 'Blue Skies'.  I left the base overnight to dry.

I had already prepared my oval photo, triple-matting the photo on some white craft foam, then an oval cut from Daffodil Delight cardstock, then the scalloped oval cut from Pacific Point cardstock.  I used the Ovals Framelits Dies from Stampin' Up!.

Using the 'Little Letters Thinlits Dies' from Stampin' Up!, I cut out "NOISY" six times from white cardstock, and stacked them together to give them dimension.  Using the Chevron Border punch and some Pacific Point cardstock, I stacked six separate sets of three chevrons, again to give them dimension.  I stuck the heading "NOISY" directly onto the top photo to use up some space between the powerlines, and to keep space available on my layout so the texture work could be seen.  The chevrons were put onto flags of Daffodil Delight cardstock that were kept quite thin, again to conserve space.

I grabbed a small piece of white textured Bazzill Cardstock and stamped a feather from the 'Fine Feathers' stamp set by Stampin' Up!, using Smoky Slate ink that had already been stamped off once.  The feathers were stamped randomly across this piece of cardstock.  I then watercoloured in some pale yellow at the base of the feathers to replicate cockatoo feathers.  I cut the stamped up cardstock into three separate strips, and edged them using Smoky Slate ink and a sponge.

The final touch was to use some handmade paper to mat the ground photo.  I tore some off and gave it a spritz with Tattered Angels Glimmer Mist in 'Cinnamon' so it would look a bit different from the natural handmade paper.  Then I set about layering all the elements into the layout, and added in a few small coils of natural hemp cord to balance out the page.  Add some journalling, and I'm done, right?

Nope!  When we got home from school pick up this afternoon, what do I see on my front lawn but two cockatoo feathers!  The perfect embellishments for my page!!

They may be very noisy little devils, but I love the wild birds that can be found all around our leafy suburban area!

Deb.xx


03 March 2015

MCT ~ February Designer's Challenge

Stepping a bit outside my comfort zone, I decided to do a sketch challenge with colour/photo inspiration, with the My Creative Time ~ February Designer's Challenge.


I love my MCT products, and really wanted to re-connect with Miss Emma, as she has provided so much inspiration to me over the past couple of years.  Here is my card:
I have used the Just Simply Live Stamp and Die Set from My Creative Time which features the stitched frame and banner, and a lovely assortment of small sentiments. 

I was quite taken with the colours for the challenge, and set about creating a bokeh effect for my turquoise piece of card.  The flower is from the 'Lotus Blossom' Sale-a-Bration Stamp Set from Stampin' Up!.  I stamped the flower three images on tissue paper, using 'Crisp Cantaloupe', 'Tangerine Tango' and 'Tangelo Twist'.  The stem was stamped with 'Pear Pizzaz' and 'Wild Wasabi'.  After the ink had dried on the tissue paper, I scrunched it up and then flattened it out and stuck it to a panel of white card to give the 'crushed silk' effect.

I have used some layering with foam tape and chipboard to give my card some dimension.  Overall, I'm really happy with how this card came out.

Deb.xx